eBook Conversion

eBook conversion for Kindle and ePub readers

References and links

If you’re writing non-fiction, you’ll probably want to include references and possibly links to other parts of your eBook.

Fortunately, both these features are supported and, as you’re probably aware, work on the basis of hyperlinks.

The good news is that it’s much easier to do references and links in Word or Open/Libre Office, rather than having to go into the code.

Adding a reference

This method will work whether you’re doing your HTML conversion via cKEditor or via Open/Libre Office.

To add a reference in MS Word, you put the cursor where you want the citation to appear and go to Insert > Reference > Footnote. Word gives you the choice of footnotes (which appear at the bottom of the page) and endnotes (which appear at the end of the document), but it’s not important here, as they’ll all appear at the end of the book anyway.

In Open/Libre Office, it’s almost identical – go to Insert > Footnote in the main menu.

You many want to go into the code and insert a heading for your references.

Links

You can add internal links to eBooks that behave in the same way as hyperlinks on the web. (It goes without saying that your links should be internal and should not link to the internet.)

Again, it is easier to do this using a word processor. In MS Word, you need to use the Bookmarks function, outlined here. If you convert this later using cKeditor, the links should remain when you convert it to HTML. (Using MS Word’s Insert >  Hyperlink and linking to a heading does not appear to work.)

If you want to go into the HTML code (or have to fix it), the syntax is below. It is necessary to give your link a unique name (‘foo’ in this example). The hyperlink will appear on the word ‘text’. Use the following code to create the link:

text

For the link destination, place the following markup just before it:

Converting files with Calibre (Kindle)

Calibre is a popular, free eBook utility and offers a sometimes bewildering array of features and options, including eBook synchronisation, downloading web content and library management. While I urge you to explore all these, I’m just going to concentrate on HTML to Kindle format conversion. Calibre is available for all platforms (Windows, Mac and Linux); this tutorial is based on the PC version, but it shouldn’t look too different in other versions. The author seems to update the software quite regularly, so forgive me if I’m a version or two behind.

Once you’ve downloaded and installed the program, there are two changes to the Preferences I would recommend. The Preferences button is on the top toolbar, but it may be hidden if you have a small screen and you’ll have to click the little arrow on the right to find it:

  • In Look and Feel, change the Icon Size to small. Even on a desktop monitor, there’s often not enough room for all the buttons to display at once
  • In Behaviour, change the Preferred Output Format to MOBI.

There are a multitude of (sometimes confusing) conversion options in Calibre, but because we’ve defined all the rules in our CSS, we can safely ignore the vast majority of them.

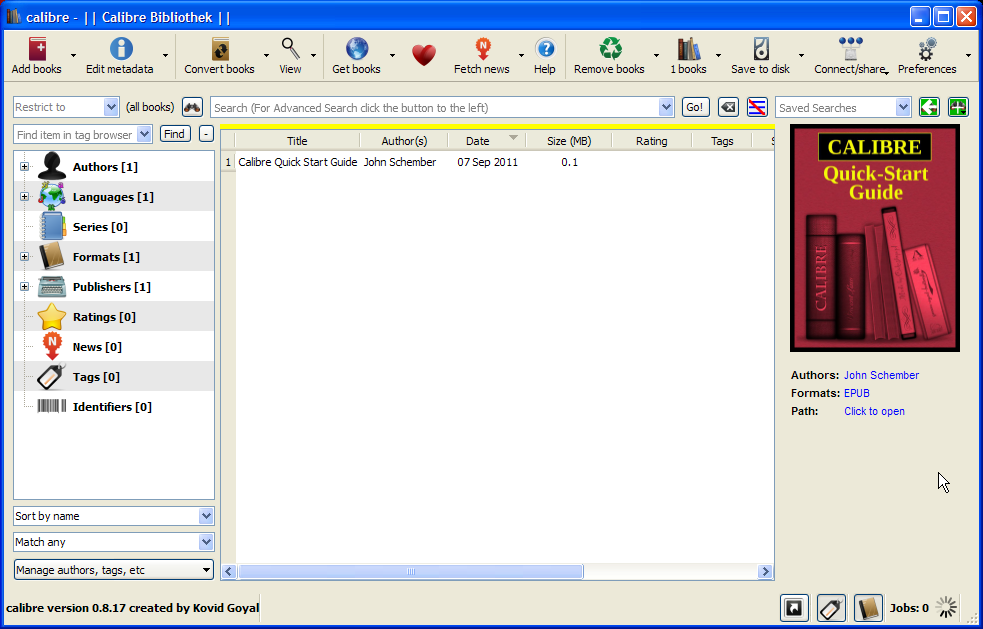
Here’s the start-up screen when you launch Calibre. In the list of projects, there’s already a copy of the Calibre Quick Start Guide.

Calibre start-up screen

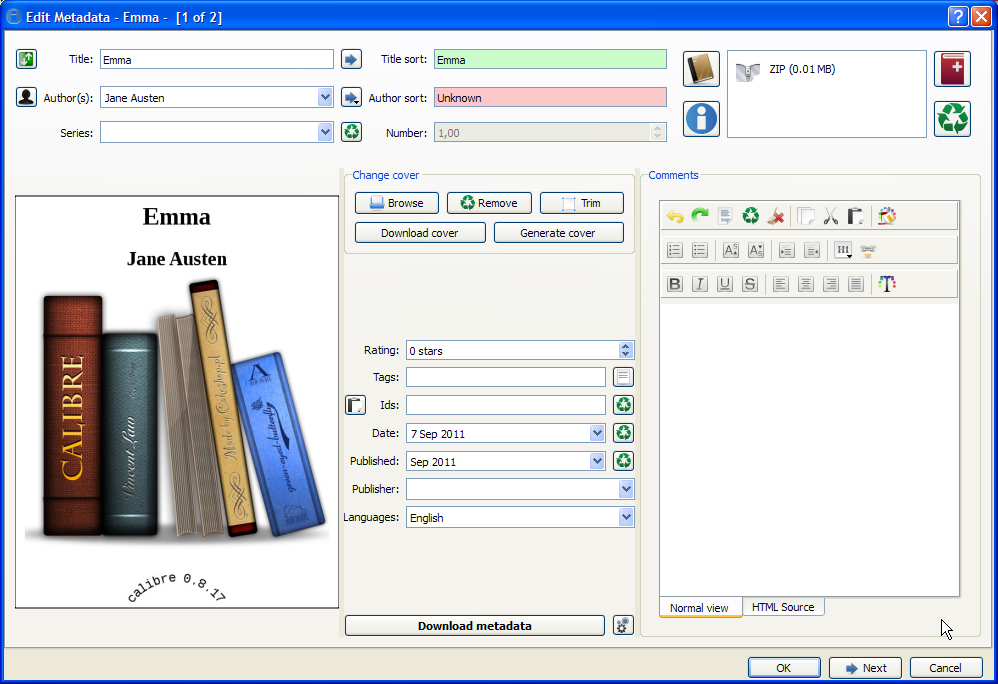
Press the Add Books button, locate your file and press OK. It will appear as a new project on the list. Select the project – I’m using Emma again as a source file – and press the Edit Metadata button.

Fill in all the fields as appropriate and upload your book cover. Calibre will generate you a book cover from the information you type in, if you press Generate Cover, but only use this for test purposes; don’t use it for the final version.

The top right of the window shows your file – Calibre converts your file to a ZIP file. Like Mobipocket Creator, you have to delete this file and add a new one if you make changes to your source – to delete a file press the button with the recycle symbol. The easiest way to add a new file is to drag it onto this window. When you’re finished, press OK.

Next, press the Convert Book button, which will display this window.

Convert Books main page

Ensure the Output Format is set to MOBI. There are loads of options in the left-hand pane – I’ll just go through the ones you need (or may need to change).

Page Setup

In the Output Profile, select Kindle.

Structure Detection

Change Chapter Mark to none.

Calibre recognises the h1, h2 and h3 heading markup. The default line of code under the heading ‘Insert page breaks before (XPath expression)’ automatically puts page breaks before the h1 and h2 headings. As I outlined here, you can set this property yourself in the CSS, so I recommend doing that and deleting the code.

MOBI Output

For reasons best known to the author, the table of contents appears at the end of the book rather than the front. You can fix this by selecting ‘Put generated Table of Contents at start of book instead of end’.

File conversion results

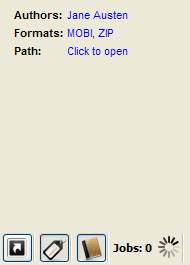
Once you’ve done all that press OK. You’ll be returned to the start-up screen and you’ll see a wheel graphic at the bottom right-hand corner. When the conversion finishes you’ll see a display like this:

Clicking on MOBI opens the book in Calibre’s built-in reader. I would recommend previewing the book in Kindle Previewer – select the ‘Click to open’ link, which will open the containing folder.

The outputted file will have a .mobi extension. Kindle Previewer may not be associated with this program, so follow the same instructions as I posted on the Mobipocket Creator page.

Converting files with Mobipocket Creator (Kindle)

The instructions below are based on the free version of Mobipocket Creator Publisher Edition 4.2. Mobipocket Creator is only available for PC.

Because you’ve created an HTML file from your original document, you can of course preview your file in any web browser, to check if everything’s looking consistent and all the images are there. If everything looks okay in the browser then the conversion should go smoothly; if not, you’ll need to fix the code. Remember that your images should be in the same folder as your HTML file.

At the bottom of many of the pages in Mobipocket Creator is an Update button. If you make any edits, make sure you press Update before leaving the page, or your changes will be lost. Forgetting to press Update is very easy to do.

Book conversion step-by-step

Clicking on any of the screen captures below will enlarge them.

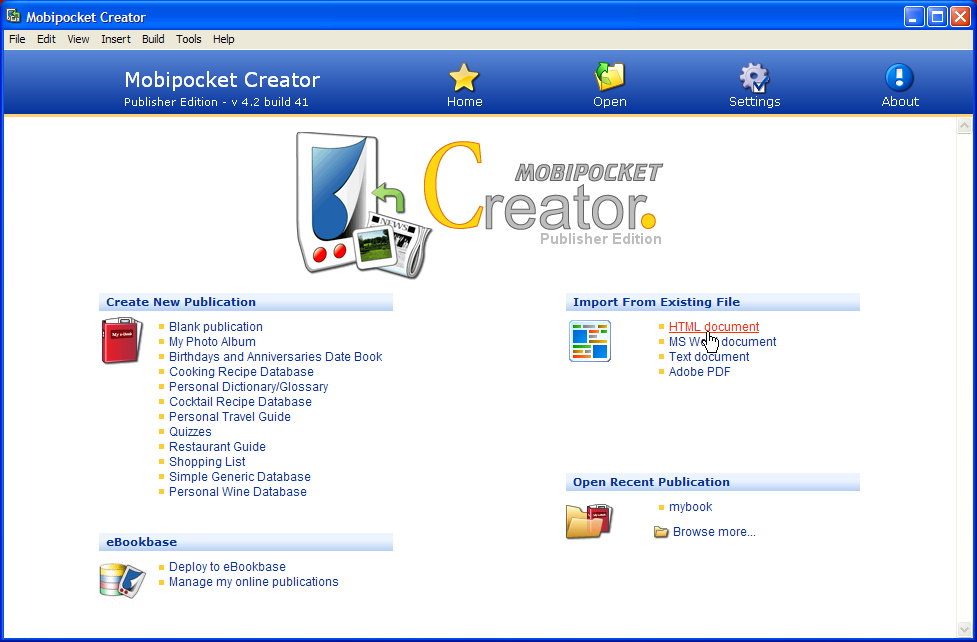
Here is the welcome screen for Mobipocket Creator. Under the ‘Import From Existing File’ heading select ‘HTML document’

Mobipocket Creator welcome screen

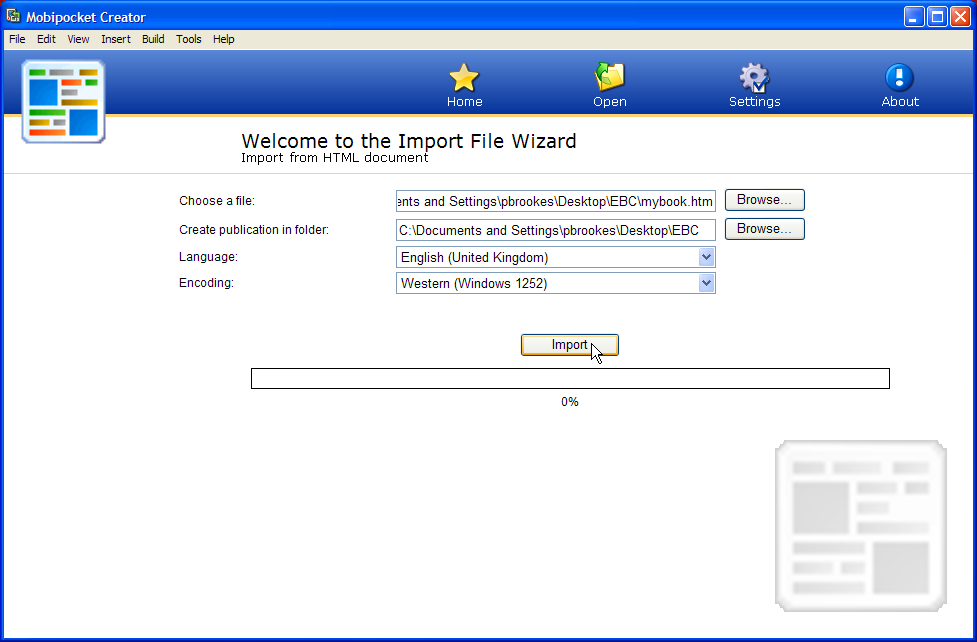
Press the Browse button by the ‘Choose a file’ field to find and select your document (alternatively you can drag the icon over the box, which will insert the filepath).

File upload page

Import File Wizard screen

Press Import to load your file. (This is usually a painless procedure; the only problem I’ve ever had is when the HTML file has no – or an incorrect – header (see Page Structure in this post for an explanation). You can ignore the other settings unless your book is in a language other than English; if so, select the correct language from the Language drop-down box.

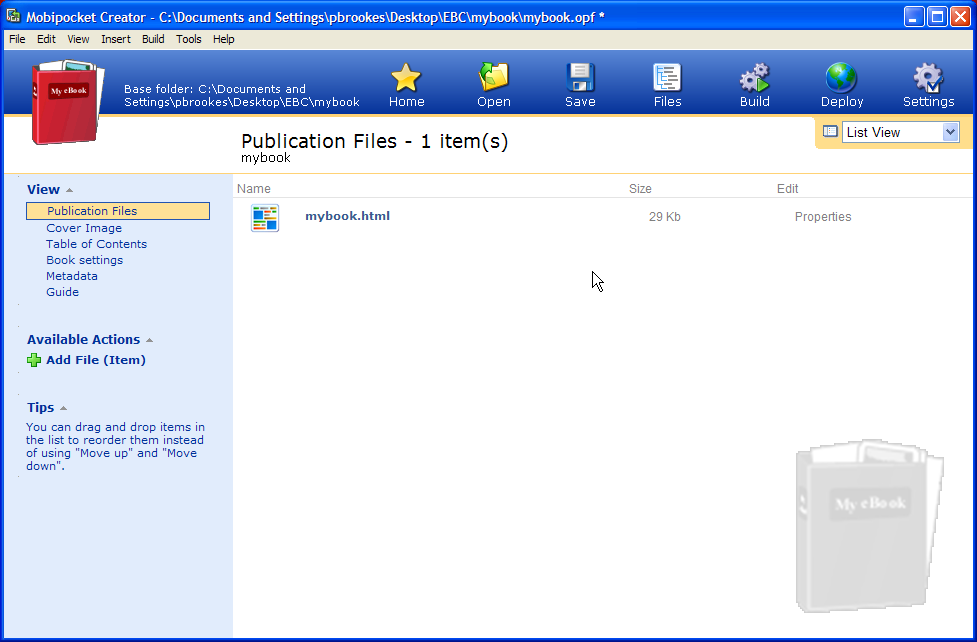
If successful, you will see this screen:

Publication Files page

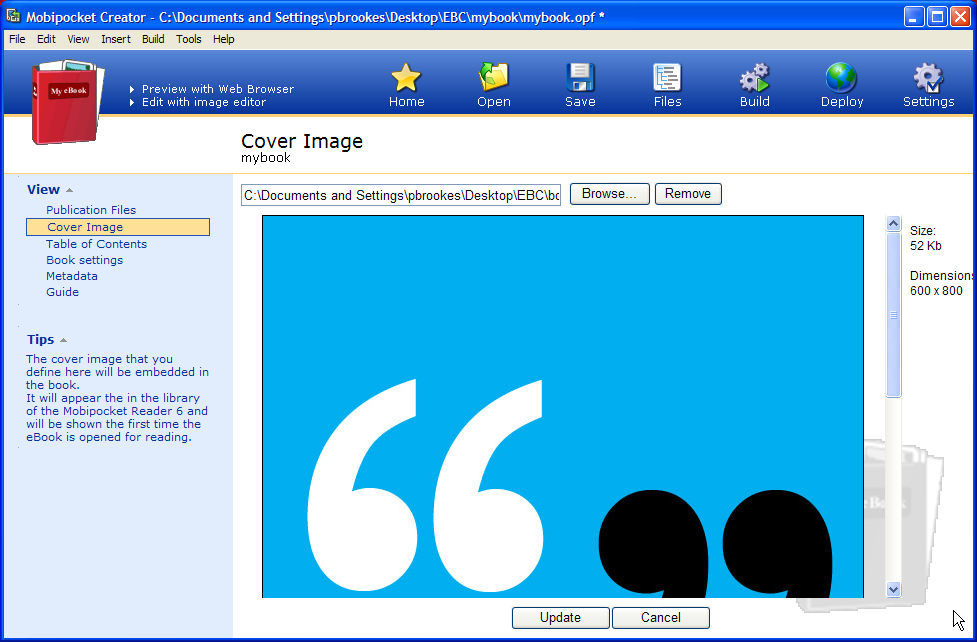
In the left-hand pane, select Cover Image. Even if you’re just testing and haven’t finalised your cover image, the software can behave oddly and produce error messages if there isn’t one there. (If you need a dummy cover image, then download this one, which is the correct size.)

Drag the cover icon over the window or press the Add a Cover Image button to navigate to the folder. Then go to the bottom of the screen and press Update.

Cover Image page

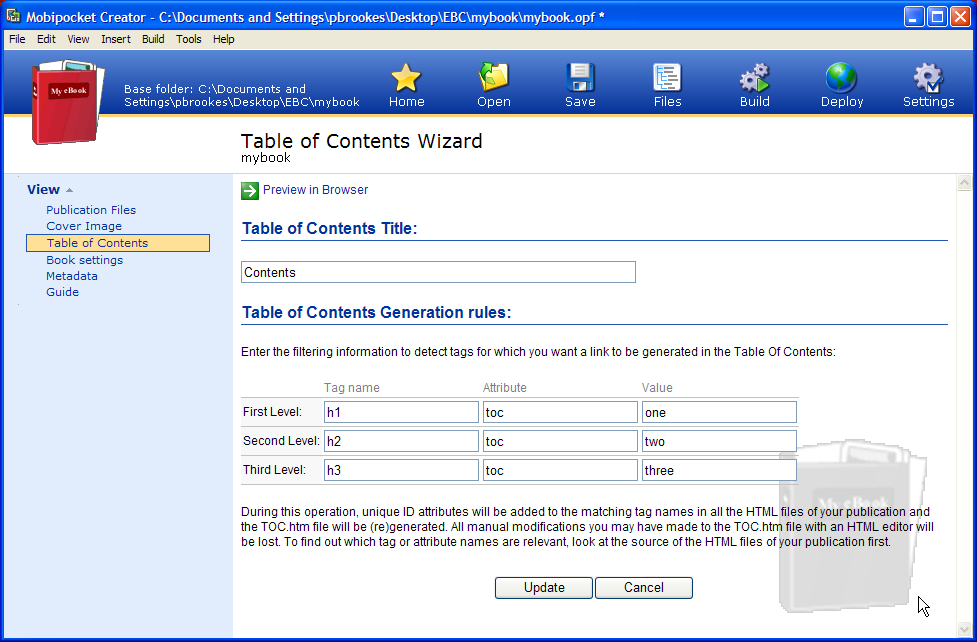
In the left-hand pane, press the Table of Contents button. The software will build the TOC for you, but only if you have your heading tags just as it likes them – see this post for details. You can have up to three levels of headings in your TOC; fill in the values as shown in the picture. You can also change the title.

Table of Contents page

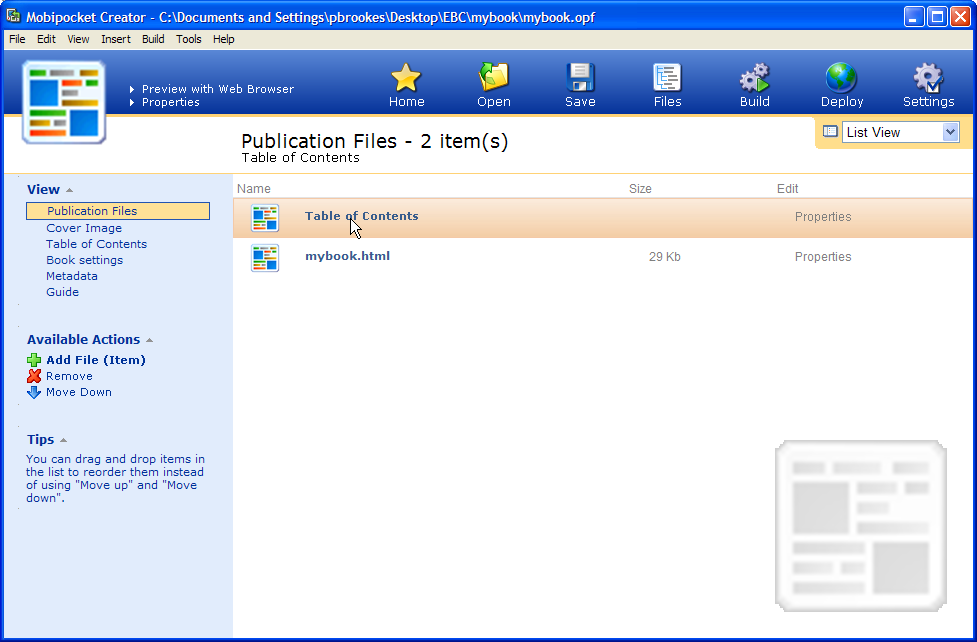
When you press update, it will take you back to the Publication Files screen, creating a new file for the TOC. If you highlight this file, you can preview the TOC by pressing the ‘Preview with Web Browser’ link at the top of the page and see if it’s working properly.

Publication files screen with Table of Contents added

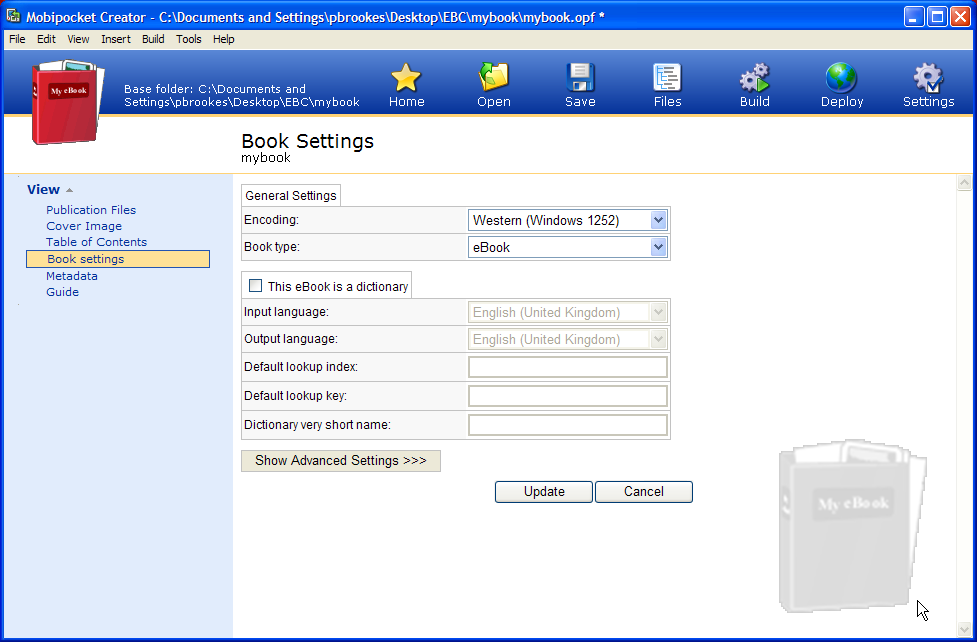
The Book Settings pane you can probably ignore, except to change the Book Type to eBook (or whatever). If your book actually is a dictionary, you’ll have to look elsewhere to find out how to fill in these fields.

Book Settings

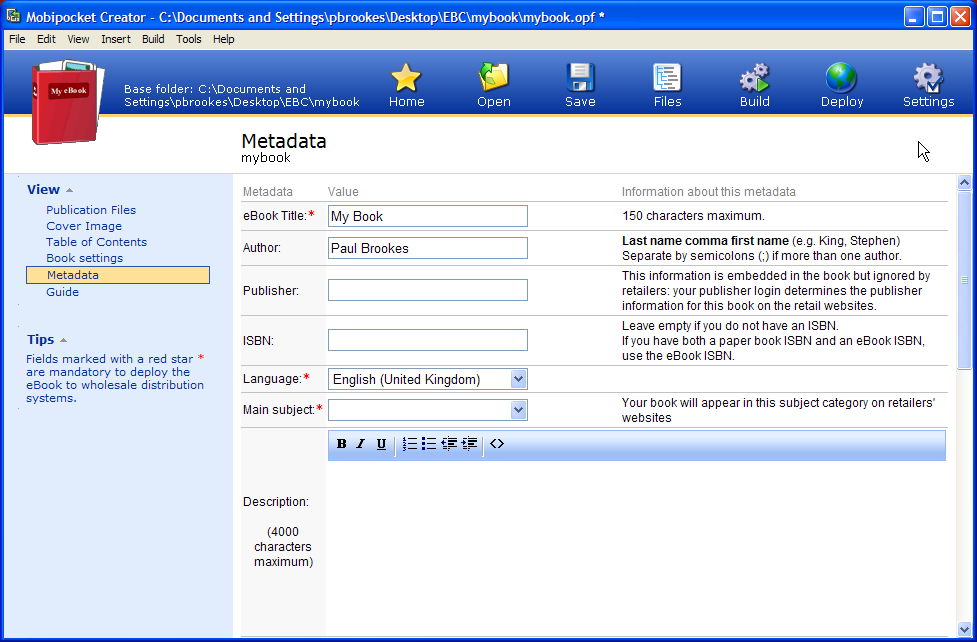
In the Metadata field, fill in as little or as much information as you like. The fields with red asterisks are mandatory. Do not forget to scroll to the bottom of the page and press Update.

The ISBN field is for the International Standard Book Number, if you have paid for one. Whether you need one or not for an eBook is debatable; I’ve outlined the subject here.


Metadata page

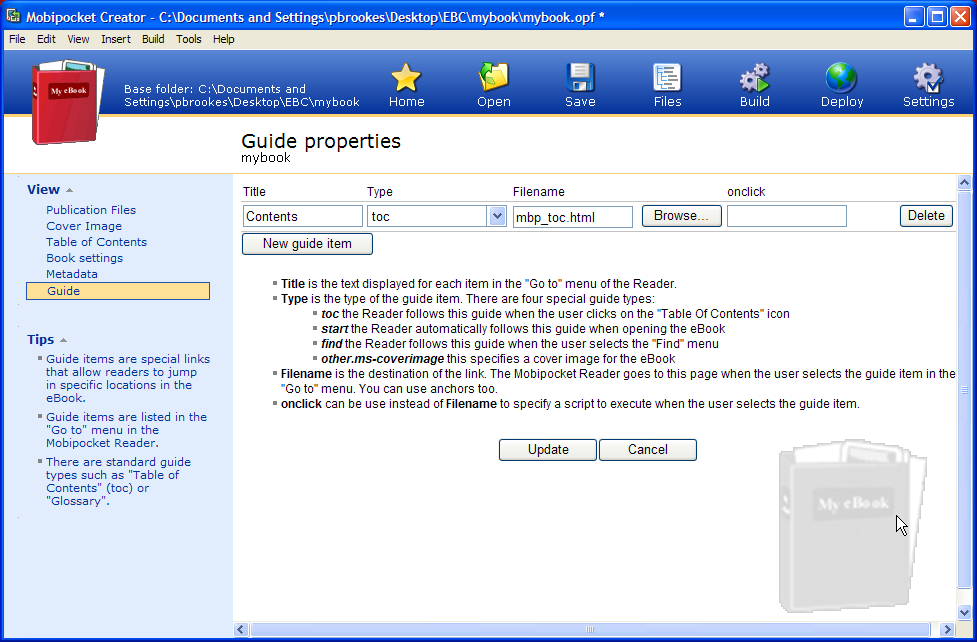
The Guide pane you can probably ignore; this is an advanced feature and I may write something in the future about using this. All it does is create additional buttons when you press Menu > Go To on your Kindle. For most people, it’s not worth worrying about.

Guide page

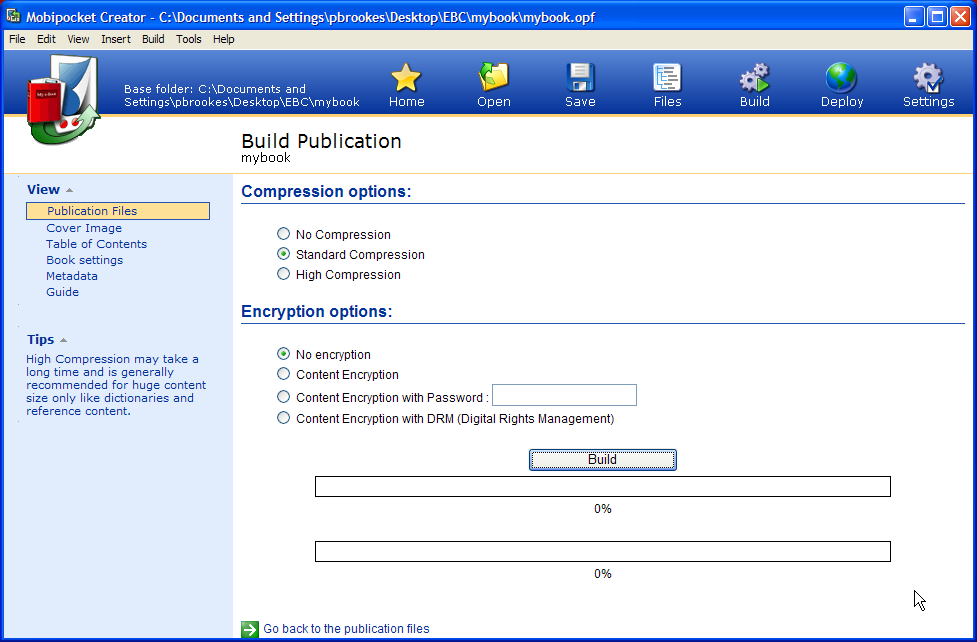
Once you’re finished, press the Build button on the top menu. I recommend keeping the default setting; you may need to select High Compression if your book is unusually large or has lots of images. Encryption (DRM) is another big topic, which I outline here; if you do decide to use it, it’s better to do it as part of the upload process when you add put your book up for sale – some vendors allow DRM; some don’t.

Build Publication page

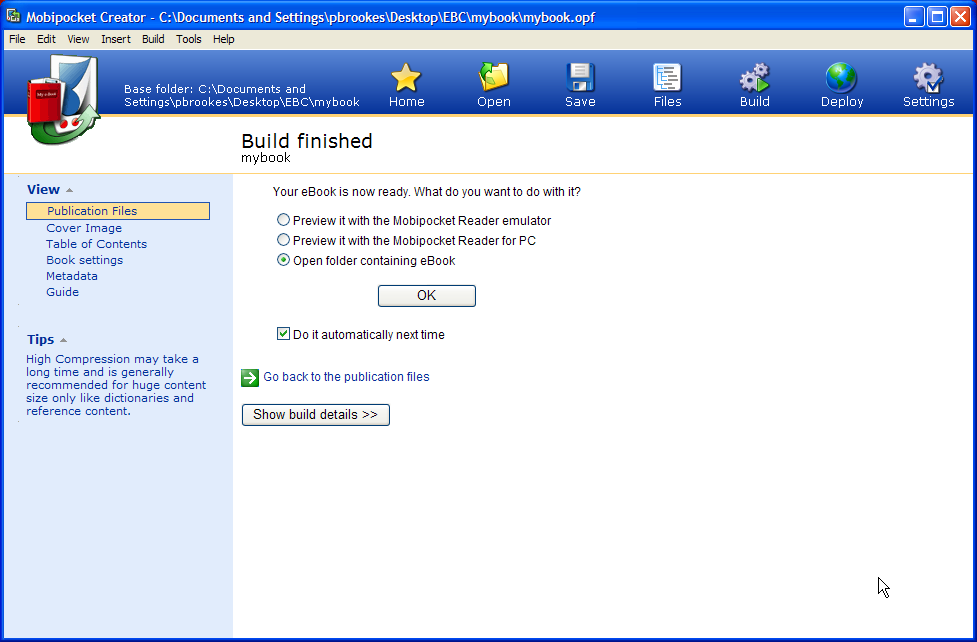
If all’s gone well, you should see this screen. For viewing the output, I recommend selecting the default ‘Open folder containing eBook’ option, which will open the folder. The file itself will have the extension .prc, which you can open in Kindle Previewer. If Kindle Previewer is not associated with the file, you’ll have to right-click on it and select Open With, then Choose Program. If Kindle Previewer is on the list, highlight it and select the ‘Always use the selected program to open this kind of file’ checkbox. If it’s not on the list, you’ll have to press Browse and hunt it down – the program is called KindlePreviewer.exe and it will probably be in C:\Documents and Settings\Local Settings\Application Data\Amazon\Kindle Previewer.

Build finished page

Troubleshooting

Here is a list of issues and fixes I’ve personally experienced in the last few months. If you can add any useful information, please leave a comment.

  1. Incorrect header in the HTML. This is a bit of text at the beginning of the HTML file that identifies it as an HTML document. It should look something like the text shown here (see Page Structure)
  2. Images in the wrong place. This is usually the result of not including a cover. Although Mobipocket Creator will output a readable file if you don’t have a cover loaded it will give you an error message and odd things may happen to the output file
  3. Updates to the file do not appear. When you update the source HTML file, you must delete the old one from Publication Files and copy over the new one. Unless you’ve made changes to headings, you shouldn’t have to build a new table of contents
  4. Data entered has gone missing. This is usually the result of forgetting to press the Update button. It’s easy to do
  5. Image not found errors. If you get this message, first check that the images are in the same folder as the file, then check that the filenames match up (remembering that they’re case sensitive). However, I’ve occasionally had this error even when the code was correct. What fixed it was adding all the images to the Publication Files page by dragging them onto the window – which is not something you should do normally – and doing a build. Once you’ve done this, the software seems to behave itself and you can delete them from the list
  6. Table of contents not outputting correctly. As I’ve mentioned, Mobipocket Creator is very fussy about this. Check the markup in Notepad++ and that you’ve filled in the fields correctly.

Table of Contents

For a table of contents, the good news is that both Calibre and Mobipocket Creator will both create contents pages based on your headings, up to level three; that is h1, h2 and h3. And as you’ll know from reading eBooks, these will be hyperlinks and will take the reader straight to the corresponding section. There’s no need to do your own TOC in MS Word, for example.

Calibre can identify the structure of your book from the file and do this automatically. I personally prefer to use Mobipocket Creator, because it’s quicker – which is important when you’re experimenting with layout – and there are fewer options to configure. However, I’ll leave the choice up to you; bear in mind, it’s PC-only. The technical details of how to configure TOCs are in the respective Calibre and Mobipocket conversion pages.

My only irritation with Mobipocket Creator is with its table of contents creator, which usually crashes unless headings have certain attributes. Fortunately, it only takes a minute or two to fix. Fire up Notepad++ and replace the following tags:

Heading tag Replace with
<h1> <h1 toc="one">
<h2> <h2 toc="two">
<h3> <h3 toc="three">


Fancy typography

Section breaks

By which I mean those fancy ornamental graphics that are used to start a new section within a chapter. There seems little agreement as to what they’re actually called; I have heard them described as dinkus, space break symbols, paragraph dividers, fleurons and glyphs. But when you see one, you’ll know what I mean.

Where to find them

Although I’m an editor, I’ve never edited fiction and assumed these things would be easy to find. The odd thing is that they’re not – the only abundant source seems to be photo libraries, who obviously charge for them.

There are free fonts available, which contain these graphics as characters, but these are of no use as typefaces on a Kindle (unless you convert them into graphics using the method described further down).

If you do find some suitable graphics on the web, bear in mind that you may not have permission to use them, unless they’re available under a Creative Commons license or similar, where you can use them as long as you credit the originator. (If you know of a free source of these images, please leave a comment.)

One solution may be to explore some of the Wingdings- or Webdings-style characters that come with Microsoft Office, for example. According to Microsoft’s terms and conditions, they’re cleared for use in publications. In Windows, you can browse through them using the Character Map, which is available in Accessories via the Start button, increase their size and then save the page as a GIF (the method is the same as I described for tables). In a photo editor, you can then cut them out to the required size.

Below are some graphics that I’ve converted from the Wingdings 1 and Wingdings 2 typefaces in Windows.

fleuron 1

fleuron 2

fleuron 3

If your book has a particular theme, you could of course use an appropriate glyph:

Inserting the graphics

Not as easy as you might think. I won’t bore you with the details – simply copy the code.

CSS

In the CSS, between the <style></style> tags, copy and paste this line:

p.sectionbreak {text-indent:0; margin-top:0.5em; margin-bottom:0.5em; text-align:center;}

You can adjust the values for margin-top and margin-bottom as you wish, to change the spacing before and after the graphic.

HTML

In the HTML, insert this line wherever you want the graphic to appear, changing the filename as appropriate (remember in HTML that filenames are case sensitive).

<p class="sectionbreak"><img src="image.gif" height="39px" width="100px" alt="section break"/></p>

Note that you must also include the width and height of the graphic in pixels, otherwise the Kindle will resize them upwards. If you’ve forgotten what size you cropped them to, these values are usually available in the information pane of the window; if not, right-click on the graphic icon and select Properties, where you’ll find the dimensions. For a section break image with a wide aspect ratio, around 100 pixels seems to work okay.

Bear in mind that, unless you define a specific location, graphics must be in the same folder as your HTML file.

If you’re not bothered about having graphics, you could use three asterisks instead. In this case, the HTML would be something like:

<p class="sectionbreak"><strong><big>*&nbsp;&nbsp;*&nbsp;&nbsp;*</big></strong></p>

Joel Friedlander at The Book Designer has written a useful article on this subject.

Drop capitals

Drop capitals (aka drop caps) look very nice on the opening paragraphs of chapters in books. Unfortunately the Kindle doesn’t really support them. It doesn’t support text wrapping around images either, so you can’t cheat by using pictures of capital letters.

The best you can do is to have first letter bigger and poking out above the text.

Option 1

The first option is to make it big and bold in the code by using the <strong> and <big> tags. It’s a bit inelegant in terms of markup. The paragraph has <p class=”first”> because the book has indented paragraphs and we need to have no indent in the first paragraph (see this page).

<p class="first"><strong><big><big><big>I</big></big></big></strong>t was a dark and stormy night; the rain fell in torrents — except at occasional intervals, when it was checked by a violent gust of wind which swept up the streets (for it is in London that our scene lies), rattling along the housetops, and fiercely agitating the scanty flame of the lamps that struggled against the darkness.</p>

Here’s the result:
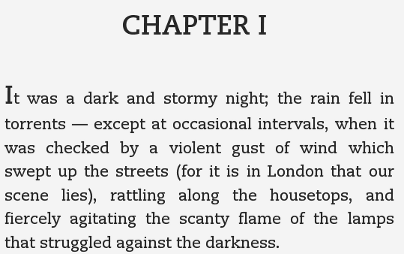
Drop capital using enlarged text

(Thanks to Natasha Fondren for this tip.)

Option 2

If you’re very patient, you could make graphics of all your drop capitals and insert those. The advantage is that you can use any typeface you want; the disadvantage is that they won’t resize with the text. The example below uses an image that’s 44 pixels high and 36 pixels wide (you have to add this in case the Kindle tries to resize it). Here’s the markup:

<p class="first"><img src="Idropcap.gif" height="44px" width="36px">t was a dark and stormy night; the rain fell in torrents — except at occasional intervals, when it was checked by a violent gust of wind which swept up the streets (for it is in London that our scene lies), rattling along the housetops, and fiercely agitating the scanty flame of the lamps that struggled against the darkness.</p>

Here’s the result:
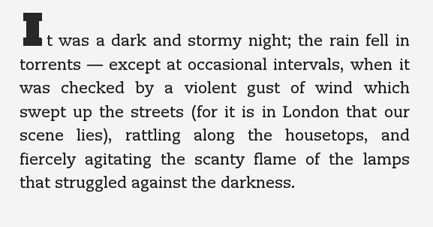
Drop capital using an image

Supported characters

In the Kindle Publishing Guidelines [PDF], there is a list of all the characters supported by the Kindle.
Converting your text to HTML

Now, here comes the most difficult bit. At this point, you’ll have fixed the layout and typography and you’ll have fixed the structure of your document in your word processor (or decided you’ll just edit the code).

Here are some options.

Read the rest of this entry »

An introduction to HTML and CSS

I’ll admit it: HTML can be scary. Somewhere in your browser menu is a command called View Source or View Page Source – if you select that, you get a load of indecipherable code that looks very intimidating.

However, at the level of a file for an eBook, it’s really isn’t so complicated. HTML is a plain text format – you can write and edit any webpage using Notepad or TextEdit. The basic idea is to surround every element with a container, which take the form of <> and </>.

For instance to make a sentence bold, you would use the <strong> tag:

<strong>This text is entirely bold.</strong>

Read the rest of this entry »

© Paul Brookes, 2015. Powered by Wordpress.